
You want a seating chart that doesn’t just point people to tables—it makes them smile, snap pics, and talk about it all night. Good news: you don’t need a giant budget or an event stylist on speed dial to pull that off. With a little creativity (and a label maker), you can turn your escort display into a mini experience.
Ready to ditch the boring board and try something people haven’t seen before?
Art You Can Actually Use
Turn your seating chart into an interactive art moment. Guests get directions and you get décor that doubles as eye candy. Win-win.
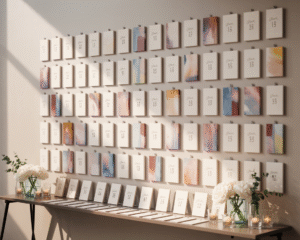
1) Paint Chip Palette Wall
Hit the hardware store and grab a rainbow of paint chips.
Print names and table numbers on each card, then clip them to a grid in gradient order. It’s colorful, graphic, and insanely cheap. Bonus: you can match your wedding palette and make it look intentional, not “we love Home Depot.”
2) Mini Canvas Gallery
Set up a wall of tiny canvases—each one with a guest’s name and table, hand-painted or stamped.
People take their mini canvas as a favor. It’s basically a gallery opening with better snacks.
If It Moves, It’s a Moment
Movement turns a glance into a memory. Add motion and you’ll draw a crowd immediately.
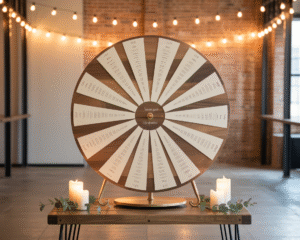
3) Lazy Susan Seating Wheel
Mount a large circular board on a turntable and divide it into table “slices.” Spin the wheel to find your table.
It’s playful, tactile, and perfect for an industrial or modern venue. Keep it sturdy and level—no wobbles allowed.
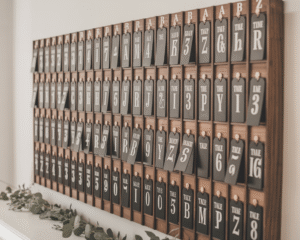
4) Flip-Tag Wall
Think old-school flip clocks, but make it wedding chic. Hang tags on hinges labeled with letters A–Z.
Guests flip their letter to reveal names and table numbers inside. It’s interactive without becoming a traffic jam.
Edible Escort Cards (Because Snacks Solve Everything)
Hungry guests are happy guests. Build your escort display with treats they can snag on the way to their seats.
5) Citrus Crush
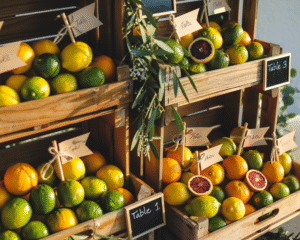
Attach name flags to lemons, limes, or blood oranges and pile them in wooden crates by table.
It smells amazing and looks fresh. For a Mediterranean or garden vibe, it’s perfection. FYI: choose heavier fruit so it doesn’t roll away like a tiny bowling ball.
6) Cookie “Coat Checks”
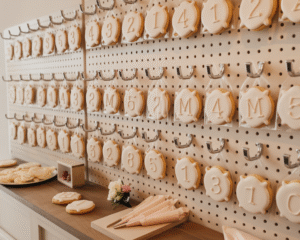
Stamp iced sugar cookies with table numbers, then hang them on a pegboard like a delicious coat check.
Wrap them in clear bags so icing stays pretty. This doubles as a favor, so yes, you just saved money.
Travel-Inspired Without the Clichés
No passport stamps or generic “wanderlust” quotes needed. Go clever instead of corny.
7) Destination Departure Board

Design a sleek board that mimics an airport departures screen—tables as “gates,” seat assignments as “boarding groups,” and your venue as the final destination.
Keep fonts clean and modern. If you’re techy, run it on a monitor and animate the flip effect. If not, print it on foam board and call it chic.
8) Vintage Luggage Tags on a Baggage Rail

Source a clothing rack, string cords across, and hang real leather (or faux) tags stamped with names and tables.
Add old suitcases underneath with greenery for texture. It gives travel vibes without screaming “Pinterest circa 2016.”
Florals, But Make Them Functional
You can go botanical without hiding names in a jungle. Keep it neat, airy, and photo-friendly.
9) Pressed Flower Acrylics
Layer pressed flowers between two acrylic sheets, then overlay minimalist name strips organized by table.
It looks like a floating garden. Indoors or out, it nails that modern-romantic sweet spot. Pro tip: use matte film behind names for readability
 .
.
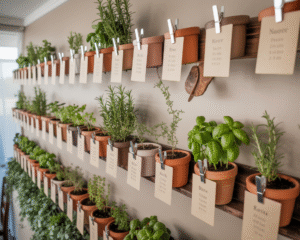
10) Potted Herb Wall
Clip name cards to small herb pots on staggered shelves—rosemary, thyme, basil.
Guests take a pot home as a favor. Your reception smells like a summer garden, and no one leaves empty-handed. IMO, it’s one of the best budget-meets-bougie hacks.
For the Statement Lovers
If you want that jaw-drop moment, go big, but keep it simple to execute.
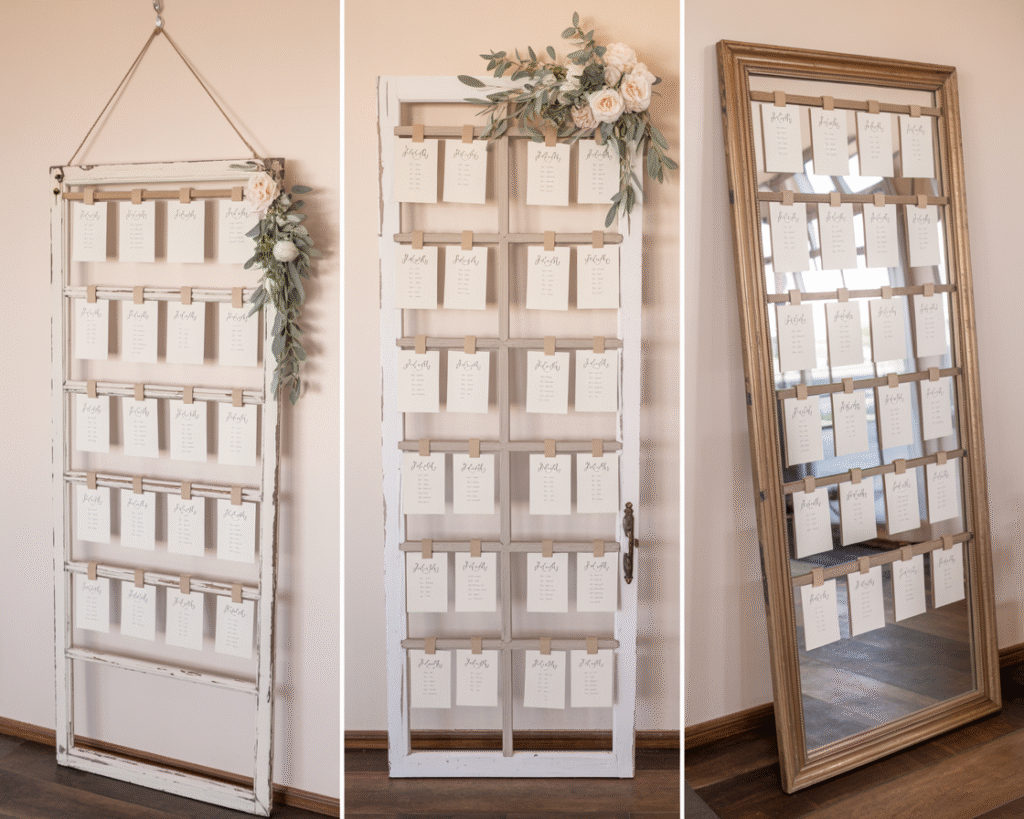
Mirrored Manifest
Use a giant arched mirror and write names in clean calligraphy or vinyl.
Add a bold floral swag or neon sign above. Mirrors bounce light and make everything feel expensive. Just position it where it won’t blind your aunt during golden hour.
Vinyl on Vessels
Apply names and table numbers to rows of ceramic or glass vessels—bud vases, carafes, candleholders.
Group them by table on shelves so guests “shop” for their seat. They look luxe clustered on reception tables later, so you recycle your own décor.
Tips to Keep It Gorgeous and Functional
All style, no chaos. Here’s how to make your unique display actually work.
- Alphabetize by last name. Skip sorting by table—it slows people down.
- Print large, high-contrast text. Decorative fonts look cute until no one can read them at night.
- Place it near cocktail hour. People will naturally check while they mingle.
- Add a tiny legend. If you use creative categories (“Gates,” “Galleys,” “Gardens”), explain them with a one-line header.
- Have a helper stationed there. A planner or friend can redirect lost guests quickly.
DIY vs.
Hire It Out
Some ideas need a Cricut and a calm Saturday. Others need a carpenter and three coffees.
- DIY-friendly: paint chips, citrus, cookies, luggage tags, potted herbs, mini canvases.
- Pro recommended: acrylic sandwich with pressed florals, spinning wheel builds, oversized mirrors with custom vinyl, animated digital boards.
- Budget tip: combine a simple base (pegboard, shelf, grid) with one special material. You’ll get high impact without high invoices.
Make It Personal (Without Monograms Everywhere)
Your story should peek through in subtle ways.
Think inside jokes, not inside baseball.
- Shared hobby: cycling? Use mini bike bells with tags.
- First date details: attach cards to takeout boxes with fortune cookie favors. Cute and on-theme.
- Pet parents: illustrate your dog or cat on the heading sign.It’s adorable, not cheesy—if you keep it minimal.
FAQs
How early should we design the seating chart?
Lock the design 6–8 weeks out so you can build or order materials. Finalize names and tables about 10 days before the wedding, then print. FYI: always print 10–15 blank backups for last-minute swaps.
What’s the difference between escort cards and place cards?
Escort cards (or displays) tell guests which table they’re at.
Place cards mark the exact seat at that table. You can do one or both, depending on how tightly you want to control the layout.
How do we handle plus-ones or guests with complicated last names?
List couples under the primary invitee’s last name and put “+1” on the same card or a separate one right beside it. For tricky spellings, use clear, consistent formatting and bigger type.
Alphabetize by last name—always.
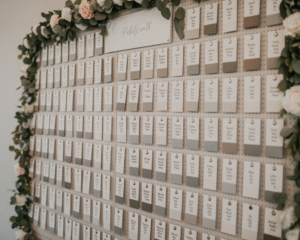
What if we have a very large guest list?
Use multiple panels split by letter ranges (A–F, G–L, etc.) so people don’t crowd one spot. Keep lines short with larger fonts and clear section headers. Consider mirror duplicates on each side of the room if the venue is sprawling.
Do we need a backup plan for wind or rain?
Yes, always.
Weights for freestanding boards, museum putty for lightweight items, and covered locations for paper-heavy displays. If outdoors, avoid flimsy easels and switch to acrylic, wood, or sealed pieces.
Can we make this eco-friendly?
Totally. Use recycled paper, thrifted frames, potted plants instead of cut florals, and edible or reusable favors.
Donate or resell sturdy elements after the wedding. Small choices add up, IMO.
Bottom Line
Your seating chart doesn’t need to be a forgettable spreadsheet on a stick. Turn it into a mini moment that shows your style, guides your guests, and maybe hands them a cookie.
Pick one idea, personalize it, and keep readability front and center. Do that, and your chart won’t just seat people—it’ll spark the first conversation of the night.