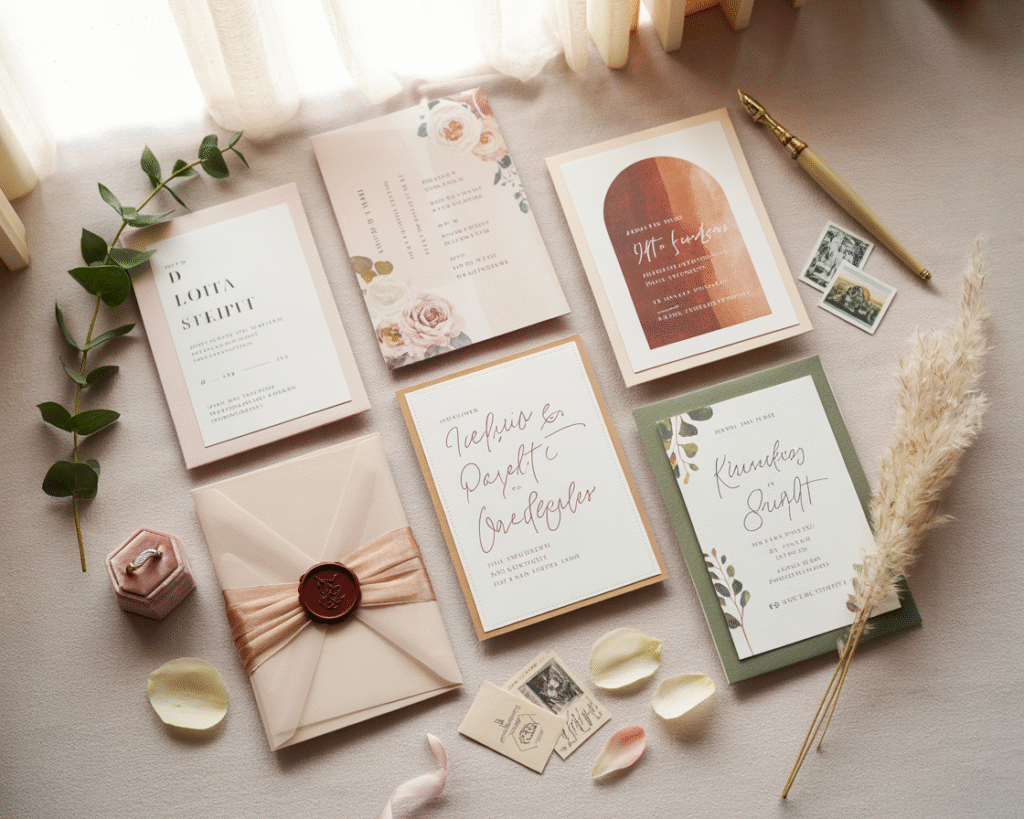
Your wedding invitation sets the tone for everything: the vibe, the dress code, and yes, whether Aunt Linda packs her dancing shoes. So let’s cut to the chase—no fluff, just ten stylish invitation designs that actually match your aesthetic. Whether you love clean modern lines or florals for days, there’s a look here that’ll make your guests RSVP with heart eyes.
Modern Minimalist Magic
Clean, crisp, and effortlessly chic.
Minimalist invites keep things simple with a lot of white space, strong typography, and subtle textures. Think: black ink, sans serif fonts, and maybe one small graphic moment.
Design Details to Nail
- Typography: Pair a bold sans serif for names with a slimmer font for details.
- Color palette: Black and white, or charcoal with a single accent (sage, blush, or rust).
- Paper: Thick, matte stock or soft cotton paper for a luxe feel.
FYI: Minimalist doesn’t mean boring. It means confident.
Romantic Watercolor Wash
Soft watercolor washes add movement and emotion without shouting.
You get dreamy gradients and painterly edges that feel artistic and personal.
Best Pairings
- Palette: Dusty blue, mauve, or sunset tones for a warm glow.
- Lettering: A script font for names with a clean serif for the details.
- Printed or Hand-Painted: Digitally printed for budget, hand-painted for a splurge.
IMO, watercolor works especially well for seaside or garden weddings.
Vintage Flora & Flourish
This look uses botanical illustrations, ornate borders, and heritage vibes—like you found a stack of love letters in an antique trunk. It’s romantic, but not saccharine.
How to Keep It Fresh
- Balance: Use detailed florals on the border, keep the center clean.
- Ink: Deep green, burgundy, or sepia for that library-core moment.
- Add-ons: Wax seals, vellum wraps, and silk ribbons. Yes, all three if you love drama.
Bold & Graphic (for the Statement Couple)
Ready to be extra—in a good way?
Go for oversized typography, color blocking, and geometric shapes. Your invites will feel like a gallery opening, not a tea party.
Design Power Moves
- Typography as art: Stack names, wrap text, play with scale.
- Contrasts: Black + cobalt, terracotta + pink, emerald + ivory.
- Print techniques: Spot color and letterpress add texture that pops.
Just keep it legible. Grandma needs to read the time without squinting.
Eco-Chic and Earthy
You want gorgeous paper and a lighter footprint?
Go for recycled stocks, seeded paper, and minimal ink coverage. The vibe: chic, grounded, and kind to the planet.
Smart Sustainable Choices
- Seeded paper: Guests can plant your invite—wildflowers for the win.
- Digital RSVP: Include a QR code to skip printed inserts.
- Muted inks: Earthy tones like terracotta, olive, and clay look luxe.
FYI: Recycled paper with visible fibers looks artisanal, not “craft class.”
Old-World Luxury
This is the “champagne tower” of invitation styles. Think thick cotton paper, foil stamping, and hand-torn edges.
If your venue has a ballroom, this one’s calling.
Elements That Elevate
- Calligraphy: Hire a pro or use a high-quality calligraphy font.
- Foil & emboss: Gold foil for a crest or monogram = instant heirloom.
- Envelope liners: Marble, toile, or custom venue illustrations.
Yes, it’s a splurge. No, you won’t regret it.
Rustic Meets Refined
Barn wedding, but make it chic. Pair natural textures with polished typography for that “we camp, but we pack a charcuterie board” energy.
Textures to Try
- Kraft or handmade paper: Adds warmth and character.
- Twine or ribbon: Tie with a simple tag or wax seal.
- Motifs: Ferns, mountains, or subtle woodgrain backgrounds.
Monochrome with a Twist
Pick one color and run with it.
When you commit to a single shade—navy, forest, even oxblood—you get cohesion without chaos.
Make It Interesting
- Texture play: Combine matte paper with glossy ink or foil.
- Tone-on-tone: Deep ink on slightly lighter paper for depth.
- Shape: Arch or scalloped edges for a modern silhouette.
IMO this reads very “editorial” and photographs like a dream.
Destination-Ready Designs
If you’re jetting off, let your invites be the boarding pass to the fun. Map illustrations, passport-style booklets, and tropical motifs set the tone instantly.
What to Include
- Travel details: Hotel blocks, transport tips, and a QR for your site.
- Palette: Match your location—Mediterranean blues, desert neutrals, jungle greens.
- Fun formats: Postcard RSVPs or luggage-tag save-the-dates.
Playful Illustrated Sets
Custom illustrations bring personality—pets, your venue, your meet-cute spot. Guests get a peek into your story, not just your schedule.
How to Personalize Without Overdoing It
- One hero illustration: Front and center, then keep the rest clean.
- Iconography: Tiny icons for ceremony, reception, and brunch.
- Color rules: Limit to 2–3 colors so it feels cohesive.
Pro Tips for Choosing Your Design
- Match the venue and dress code: Ballroom?
Go luxe. Backyard? Try rustic or watercolor.
- Set a realistic budget: Letterpress and foil look incredible, but digital can still wow with great design.
- Order a sample kit: Feel paper weights, compare whites and creams, test ink colors.
- Mind timelines: Send invites 6–8 weeks out (10–12 for destination).
Start design work 4–6 months before.
- Consider accessibility: Large font sizes and high contrast help everyone read with ease.
FAQs
How many pieces should I include in my invitation suite?
Keep it tight: the main invite, an RSVP card (or QR code), and a details card for accommodations or website info. Add reception cards or rehearsal invites only if you need them. Less paper = less confusion and less postage.
What’s the difference between digital printing, letterpress, and foil?
Digital printing lays ink flat and costs less—great for most designs.
Letterpress presses text into the paper for a textured, tactile look. Foil uses heat to stamp metallic shine; it pairs well with luxe or monochrome styles.
Do I really need inner and outer envelopes?
Not unless you love tradition. A single sturdy envelope with a liner looks polished and keeps costs down.
If you go formal-formal, inner/outer envelopes add ceremony and protect the goods.
What paper weight should I choose?
Aim for 110–120 lb cover (300–325 gsm) for a professional feel. If you’re doing letterpress or deckled edges, bump up to 140 lb+ (around 380 gsm) for that substantial, keepsake quality.
Can I mix styles, or will it look chaotic?
You can mix—just set rules. Choose one constant (color palette, typography, or paper) and let one element vary (illustration, foil, or layout).
Cohesion beats matchy-matchy every time.
When should I send save-the-dates?
Six to eight months ahead for local weddings, eight to twelve for destination. If you’re short on time, send digital save-the-dates and follow with printed invites.
Wrapping It Up
Your invitations don’t just tell people where to show up; they tell them what kind of party you’re throwing. Pick the style that feels like you, then elevate it with the right paper, print technique, and tiny details that make guests smile.
Do you need a wax seal? Maybe not. Will it make your invitations feel like a mini event?
Absolutely. Choose your vibe, commit, and let the mailman deliver the first “wow.”