Floral wedding nails can go from “cute” to “couture” fast—especially in flatlays where every detail (ring, bouquet, invitation suite) is doing the most. The secret is choosing florals that read elegant at arm’s length and expensive up close.
Below are five floral nail designs that photograph like luxury in flatlays: clean bases, intentional color stories, and just enough detail to feel bridal without looking busy.
Top 5
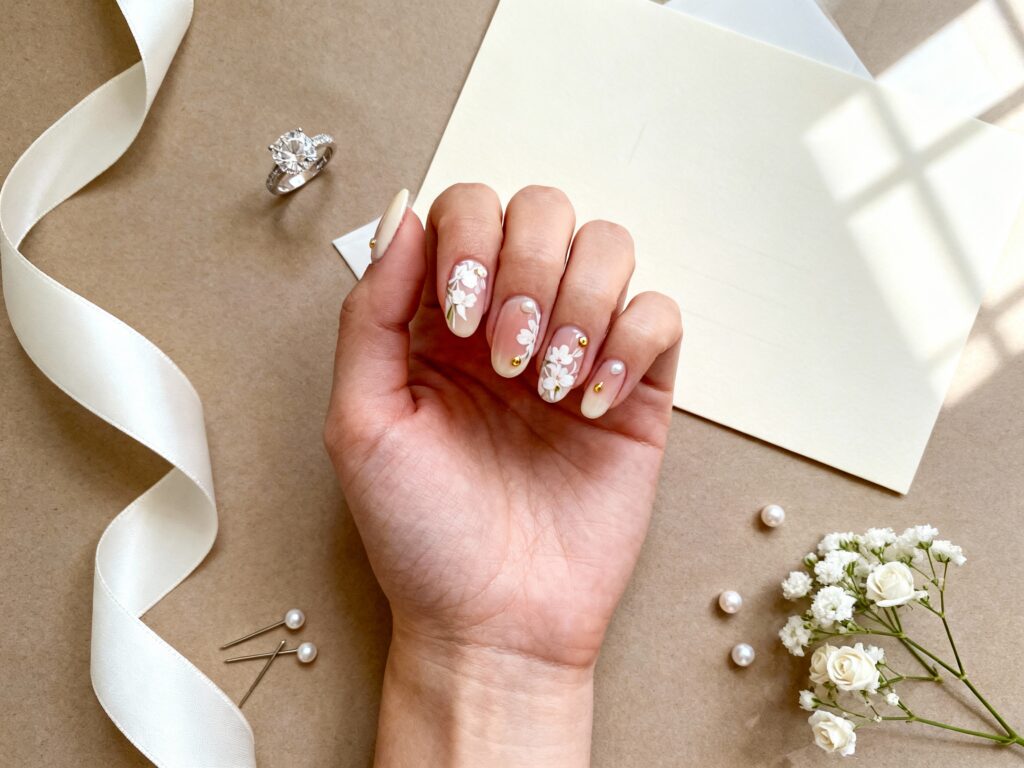
1) Milky Nude + Micro White Florals with Gold Dew Drops
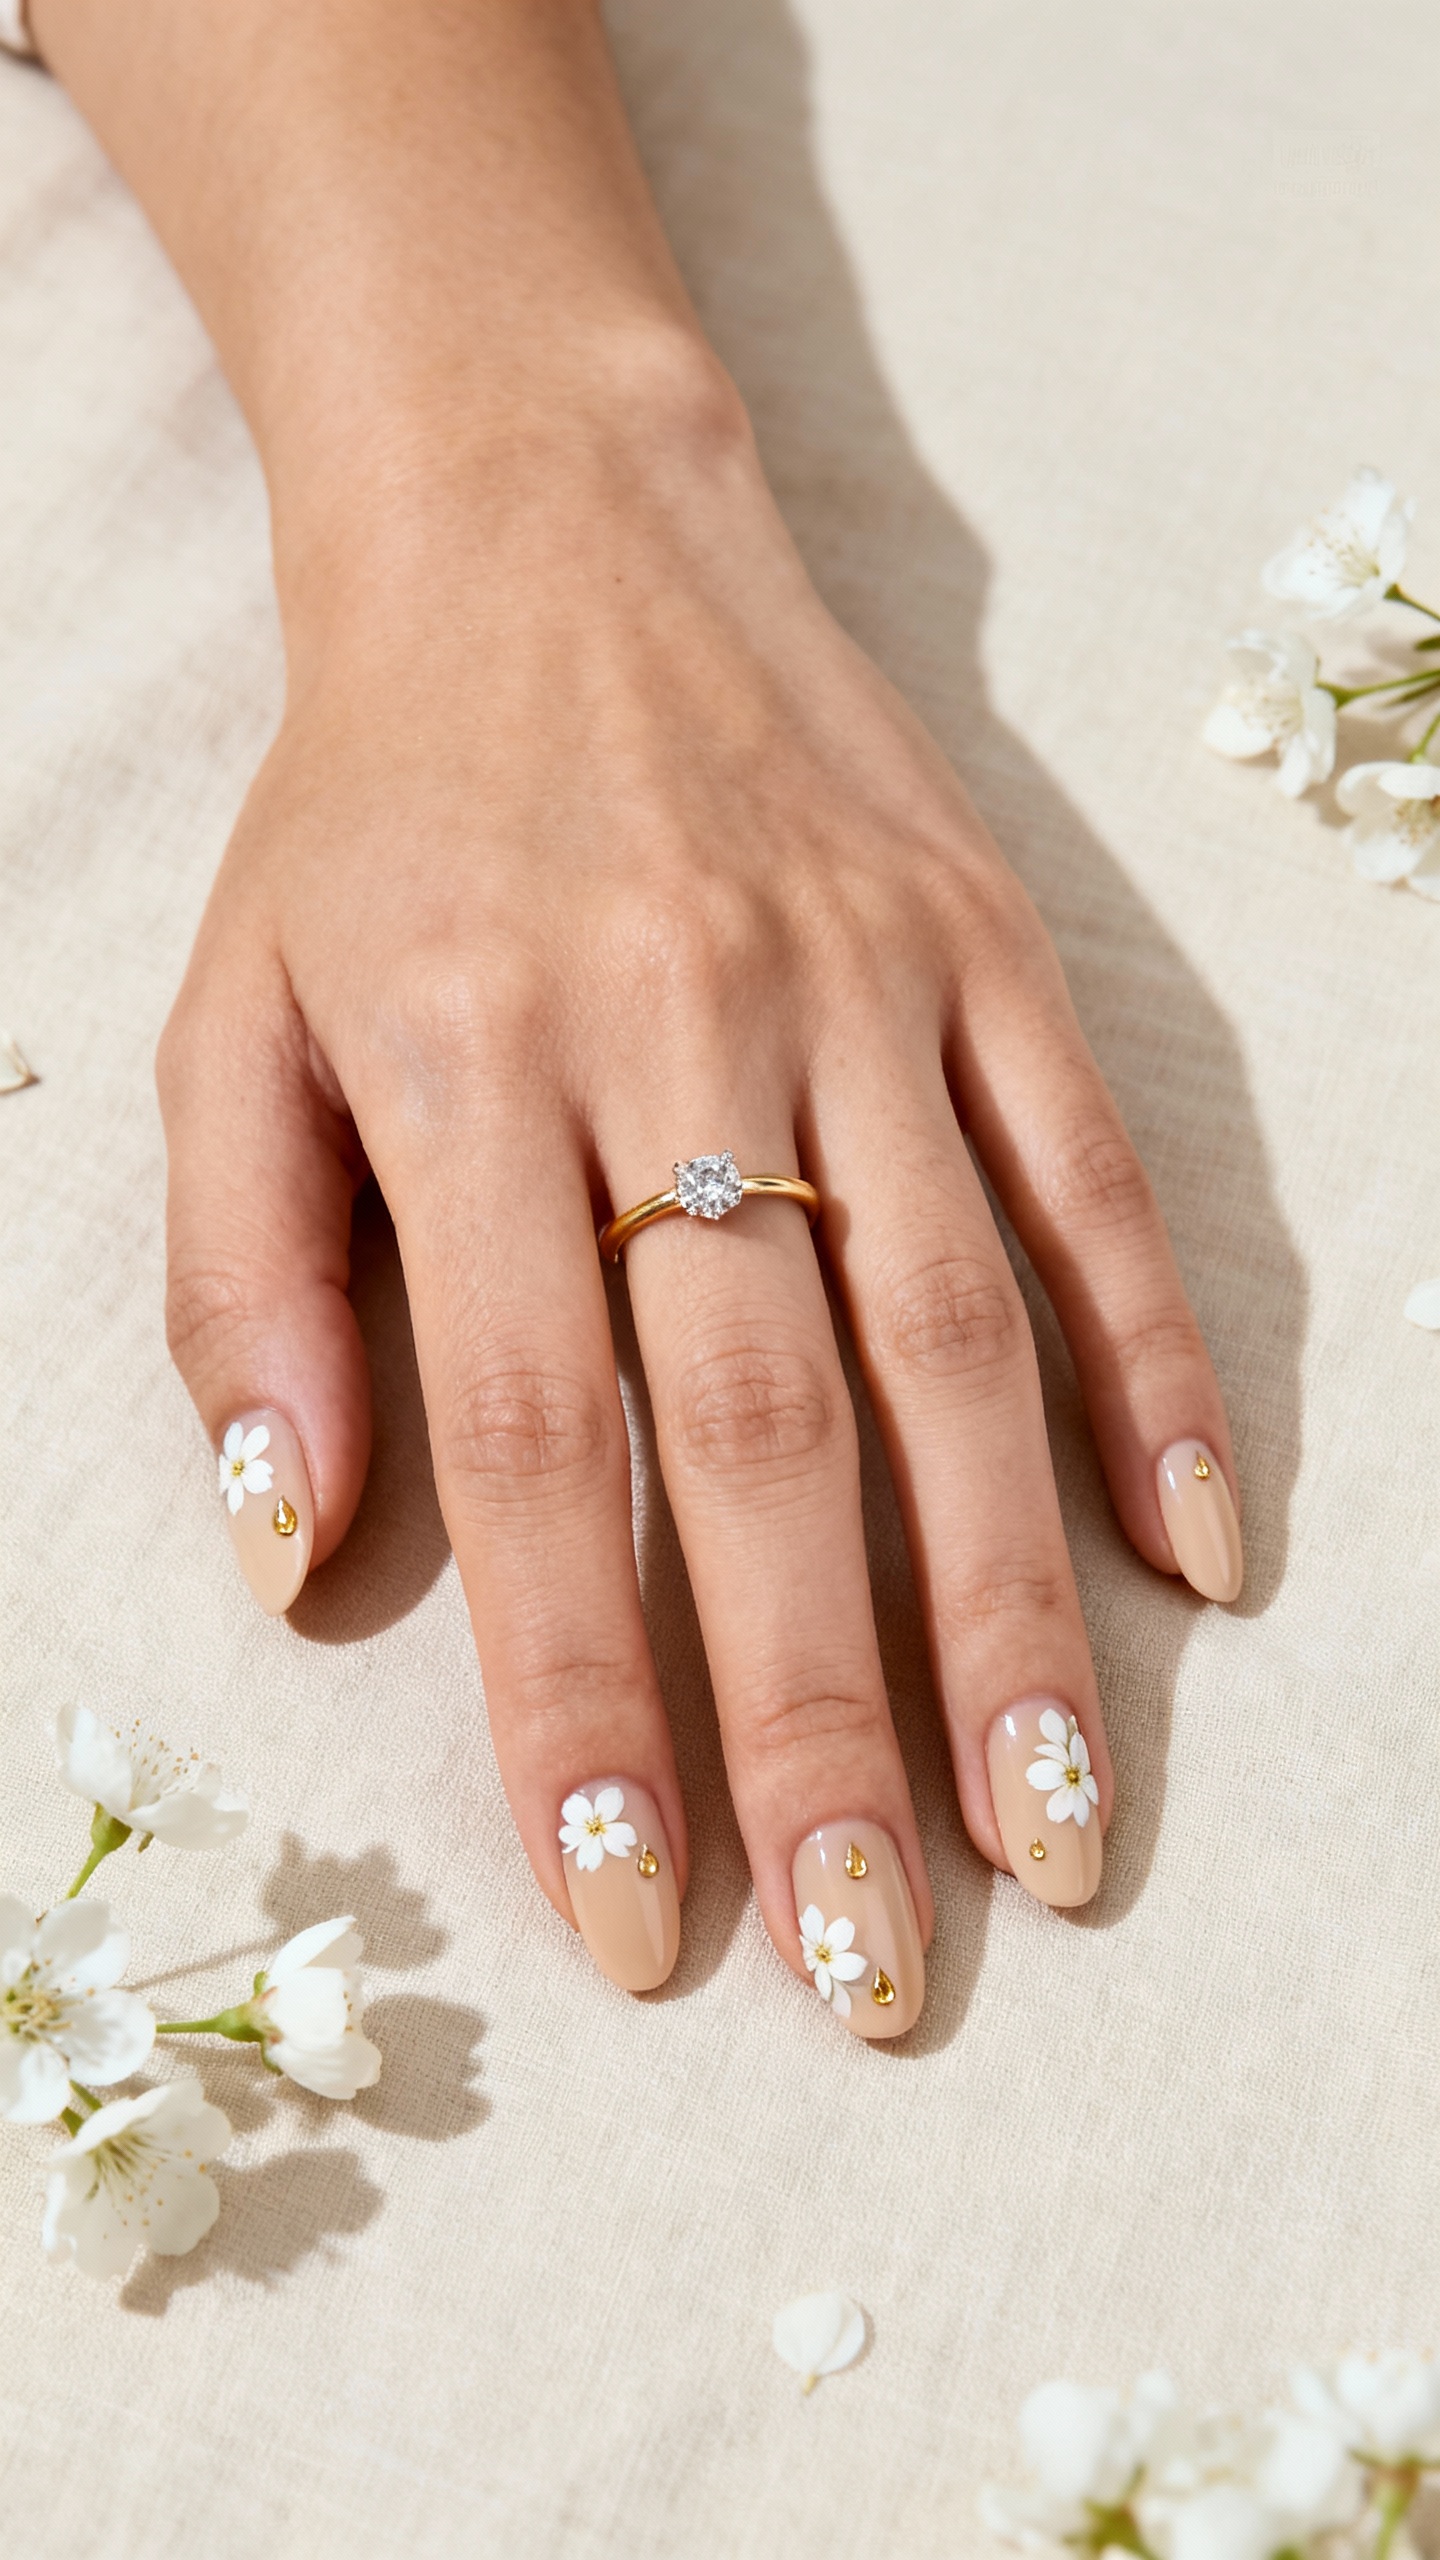
This is that “quiet luxury bride” floral: tiny white blossoms painted over a milky nude, finished with the smallest gold accents that catch light in flatlays. Go for short-to-medium almond or soft oval for a refined, elongated look without feeling flashy. Keep the color direction creamy (not pinky) so it pairs with pearls, diamonds, and satin effortlessly. Wear tip: choose gel for this one—those micro details stay crisp longer and resist chipping better than regular polish.
2) Sheer Blush French with Pressed-Flower Effect on Accent Nails
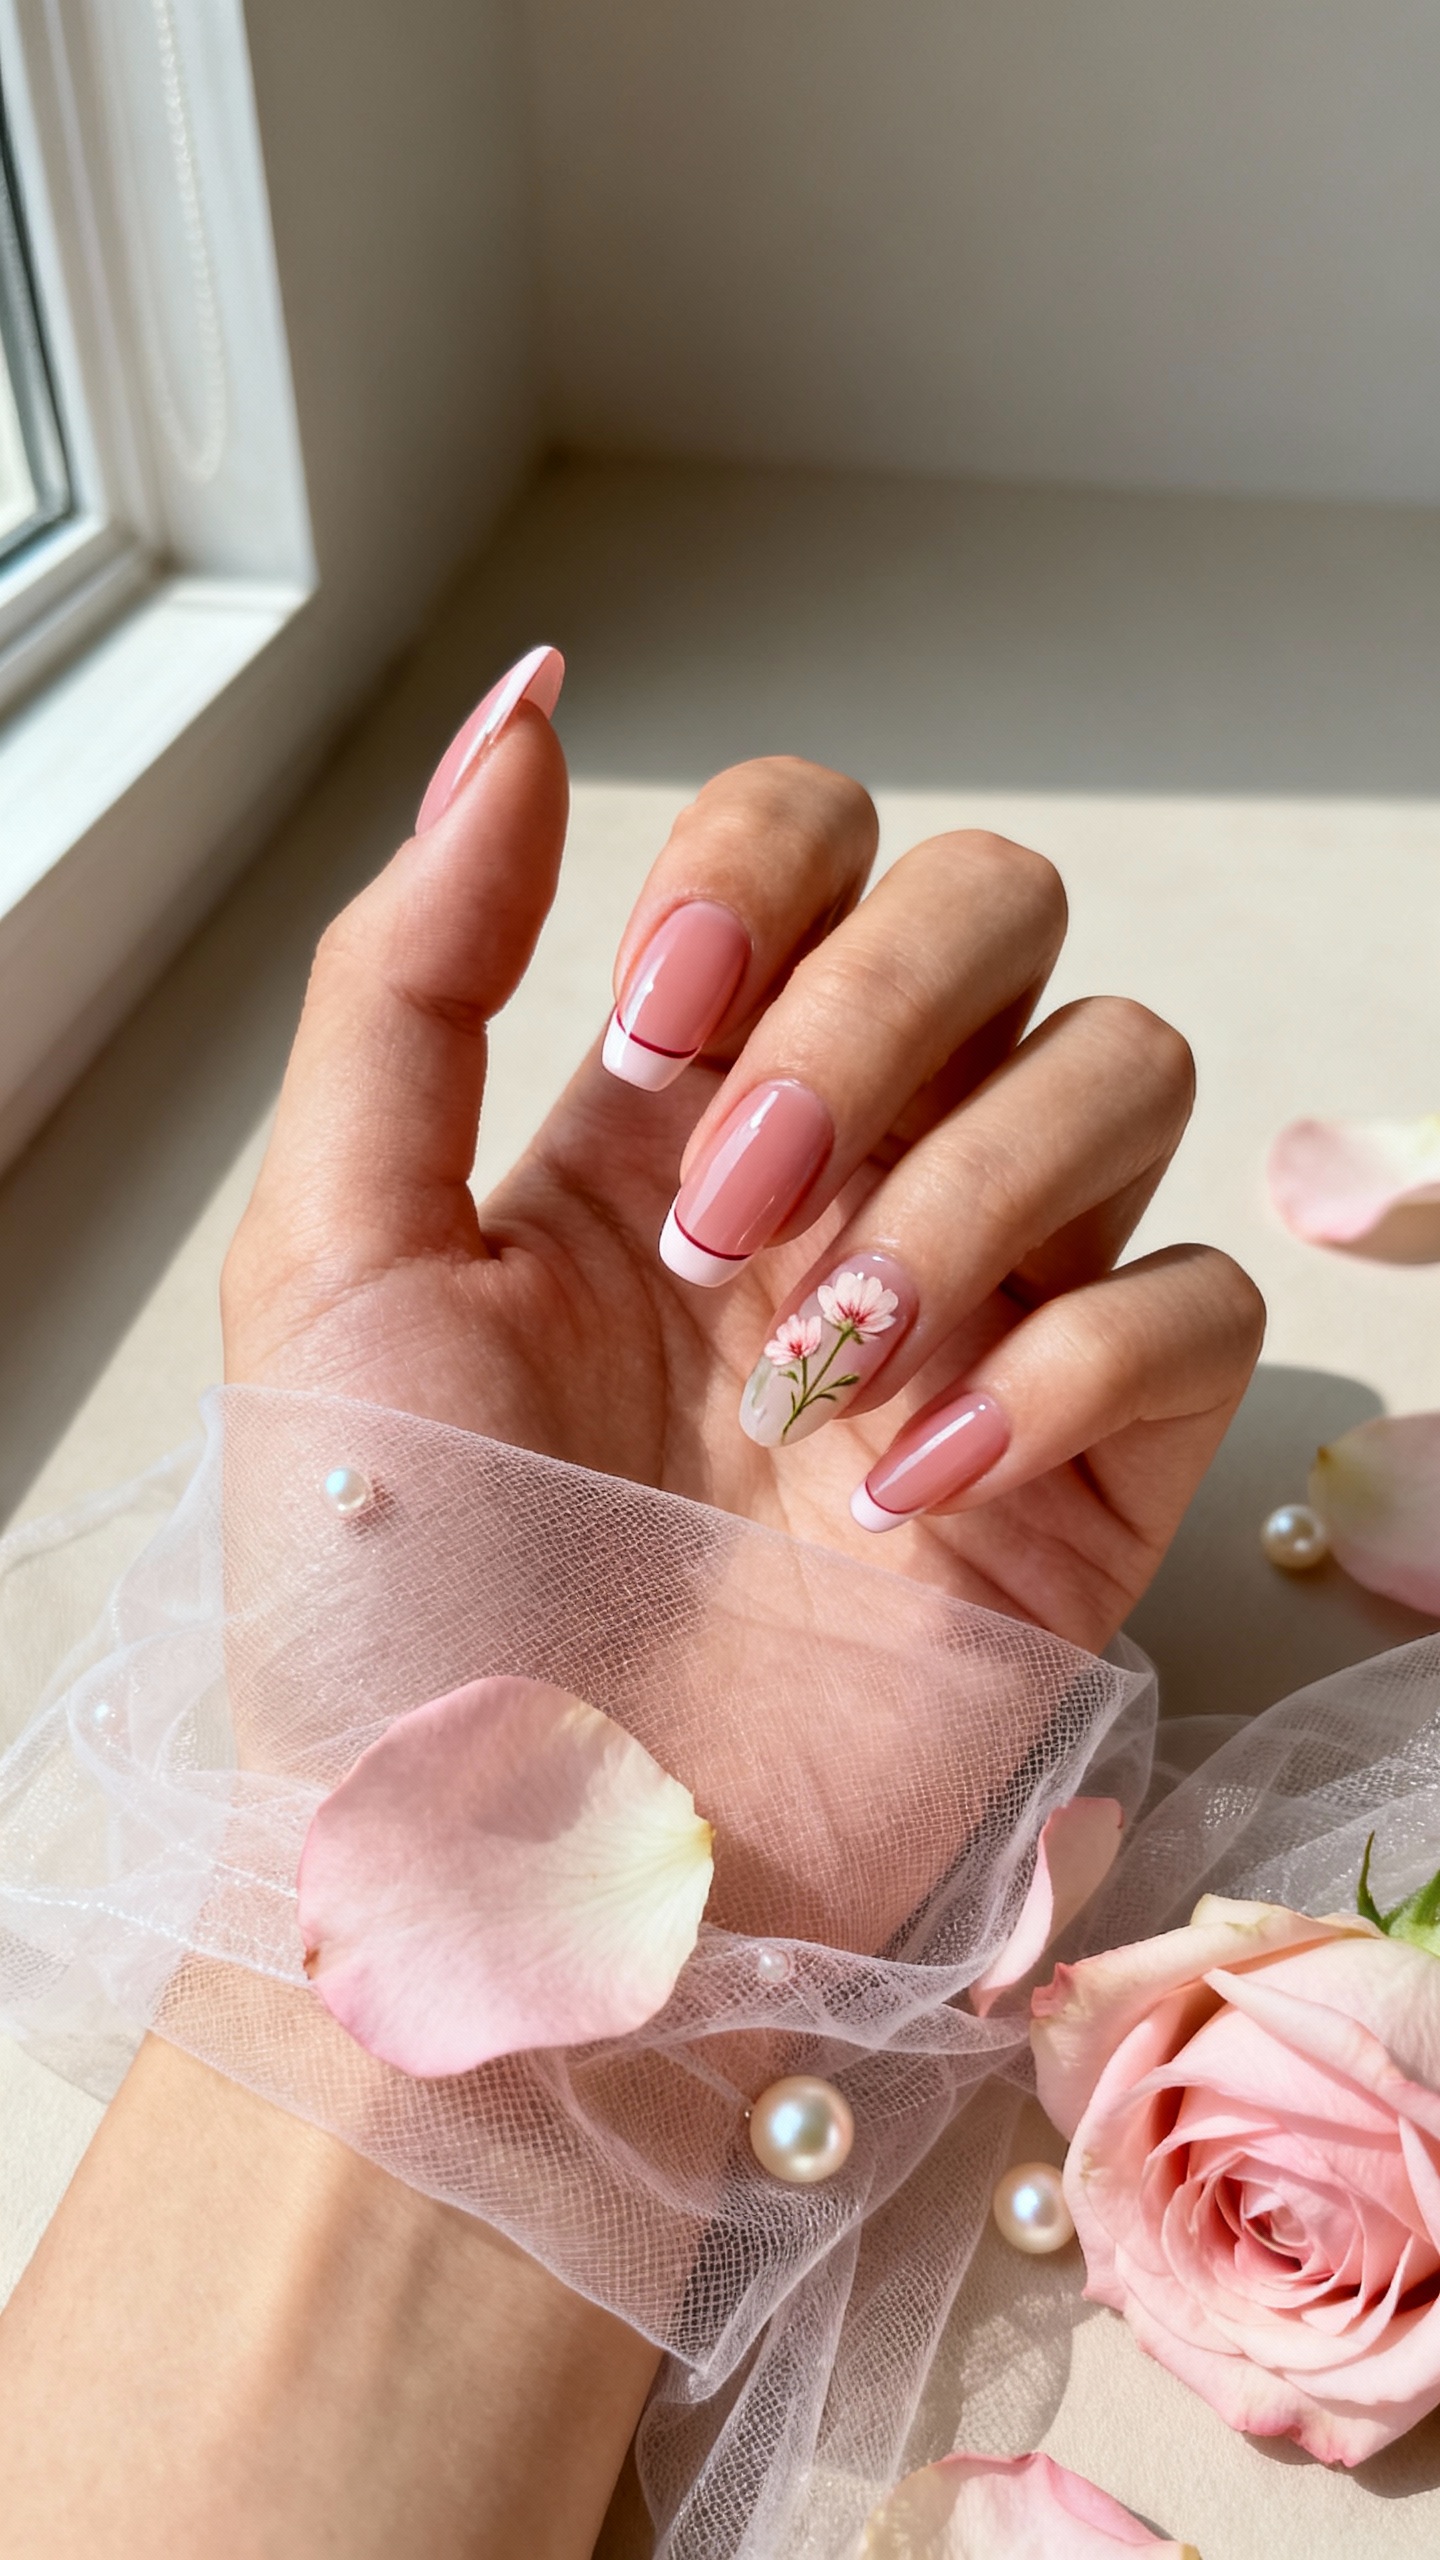
A sheer blush base with a whisper-thin French tip feels classic, then one or two accent nails mimic pressed petals sealed under glass for that luxury editorial vibe. This design looks amazing on medium almond or taper square because the shape gives the “encased” florals room to breathe. Keep flowers in soft pinks, ivory, or pale mauve so it looks cohesive with bouquets and bridal makeup. Wear tip: ask for a builder gel overlay so the pressed-flower effect stays smooth (no snagging on lace or hair).
3) Pearl Chrome Base with 3D Porcelain Blossoms (Minimal Placement)
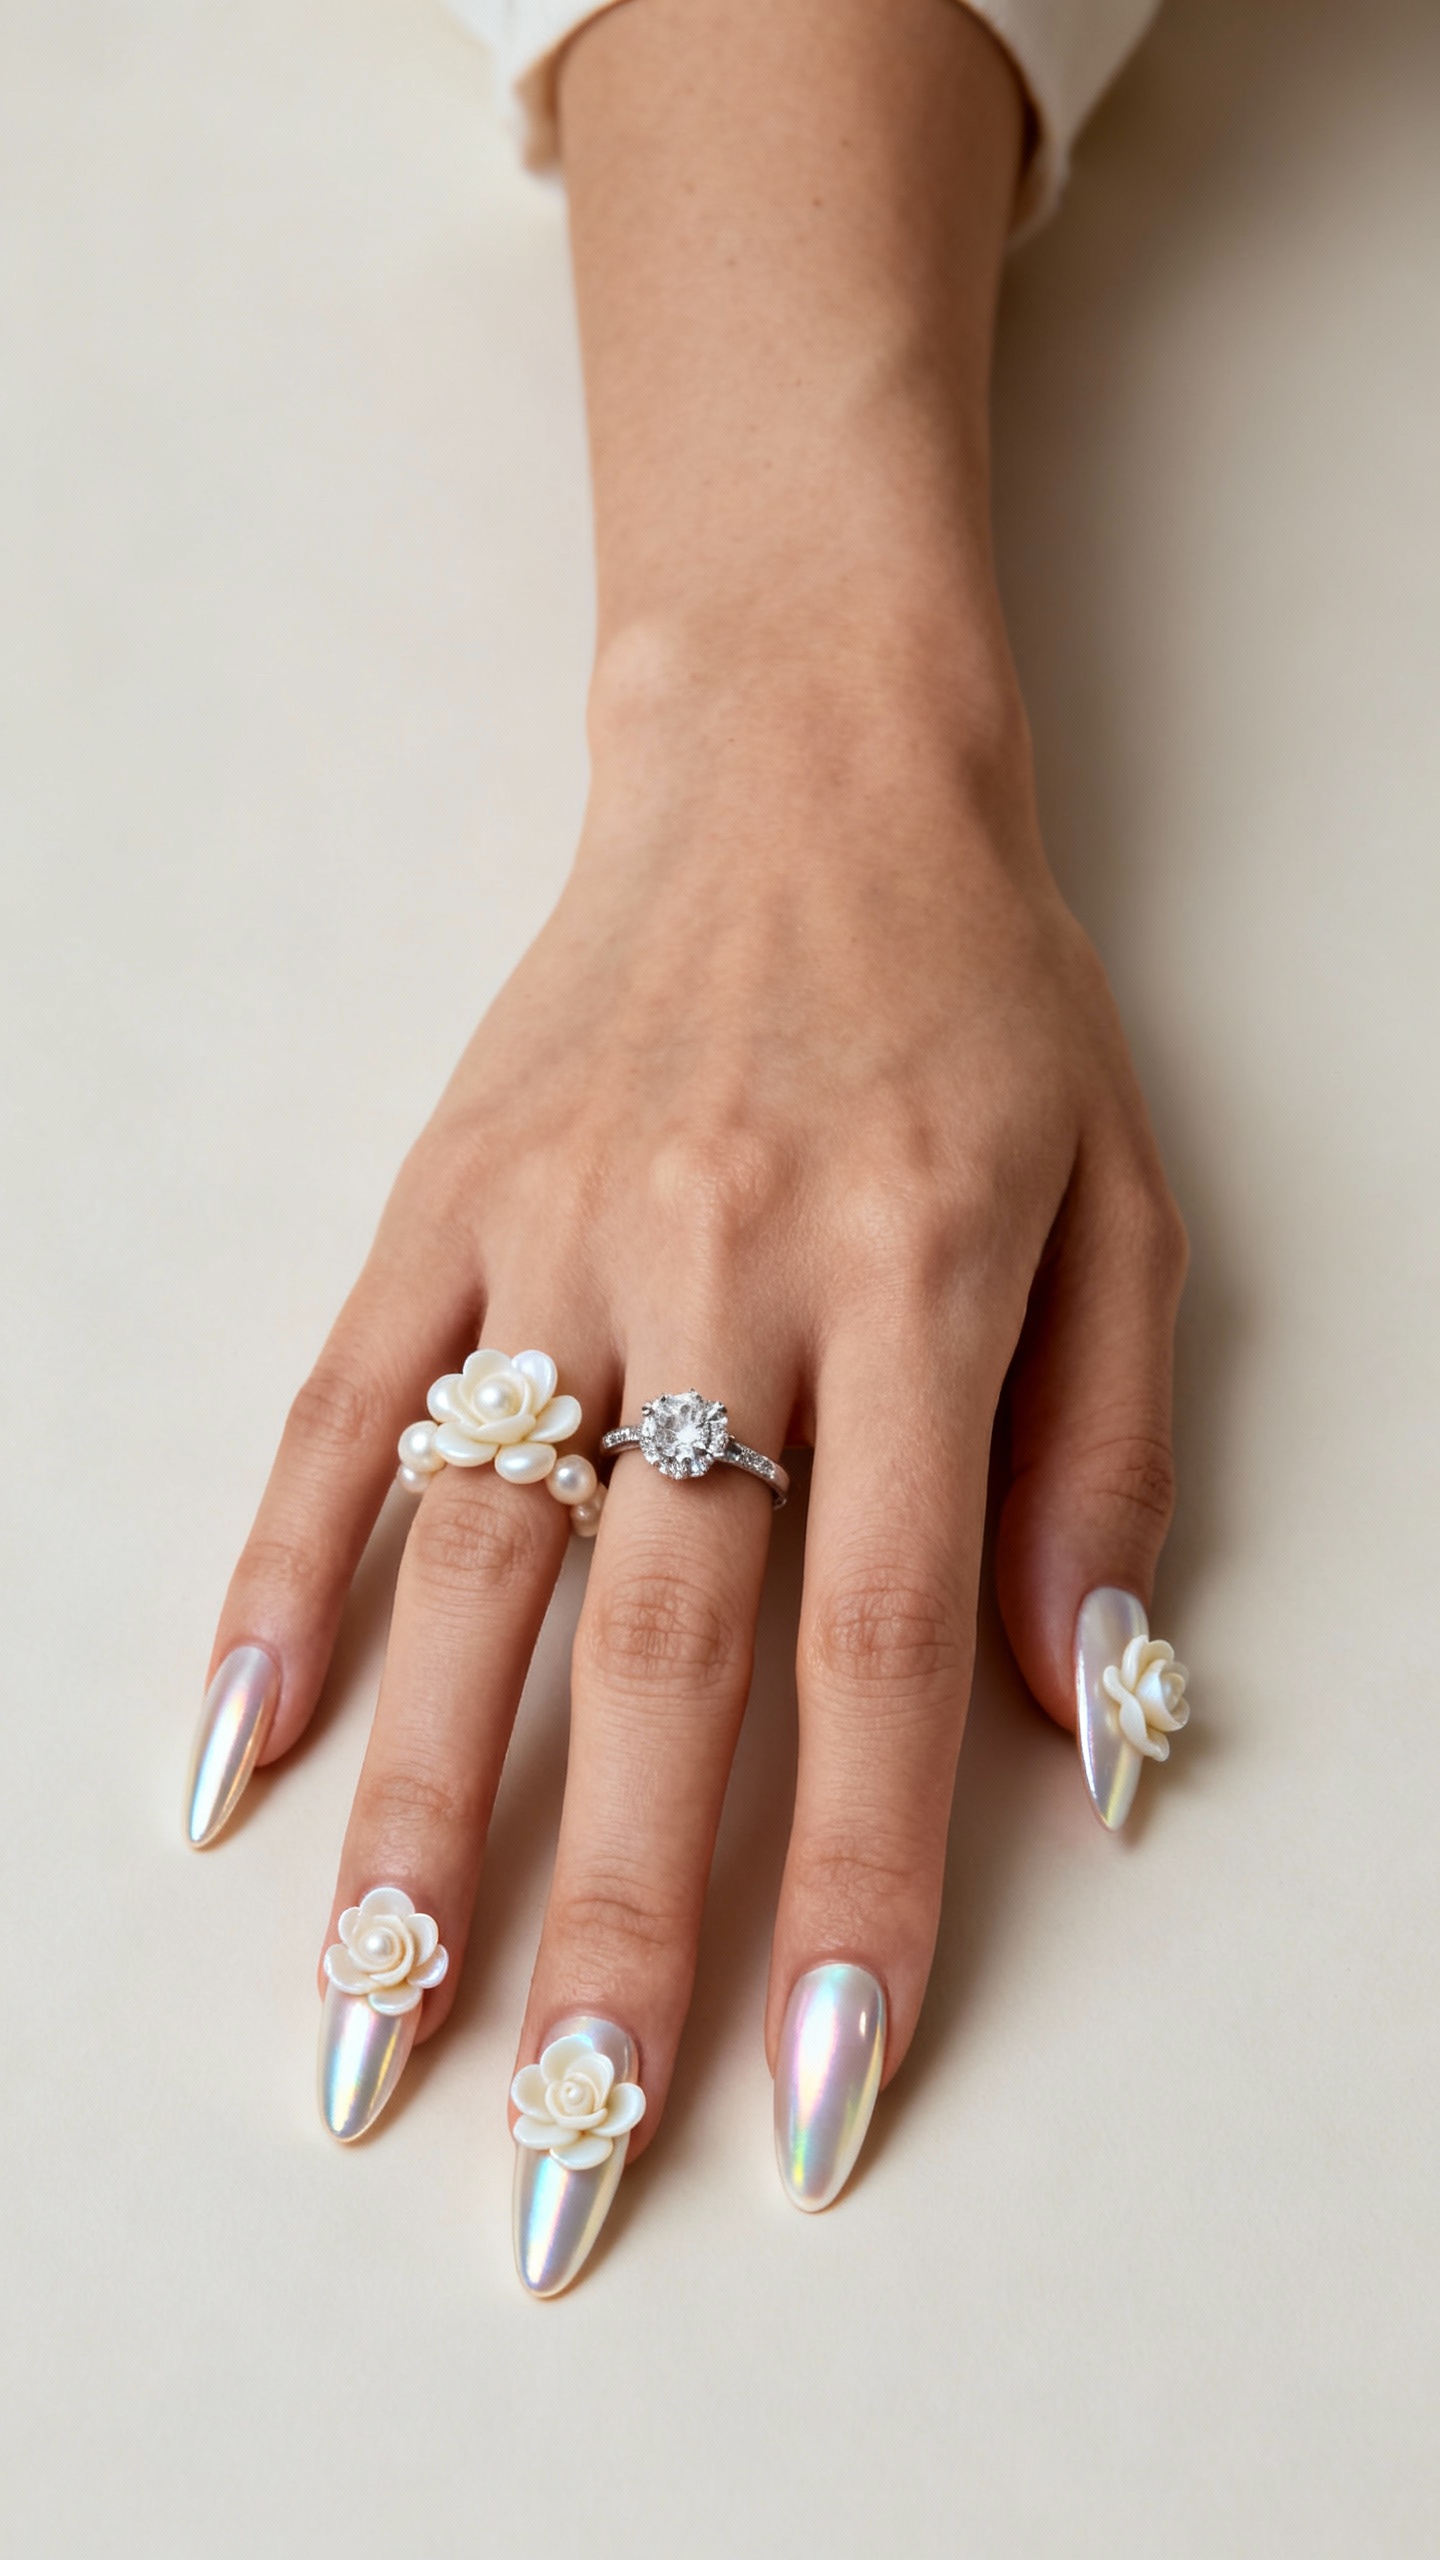
If you want florals that scream luxury in flatlays, a pearl chrome base topped with a few porcelain-style 3D blossoms is pure bridal jewelry for your nails. Best on medium length almond or coffin—short can feel crowded, and super long can shift from elegant to extra in photos. Keep the color palette monochrome (pearl, ivory, soft champagne) so the texture is the main character. Wear tip: 3D petals can catch on fabric, so place them on ring fingers only and keep the rest sleek for comfort and longevity.
4) Neutral Marble + Hand-Painted Botanical Line Art
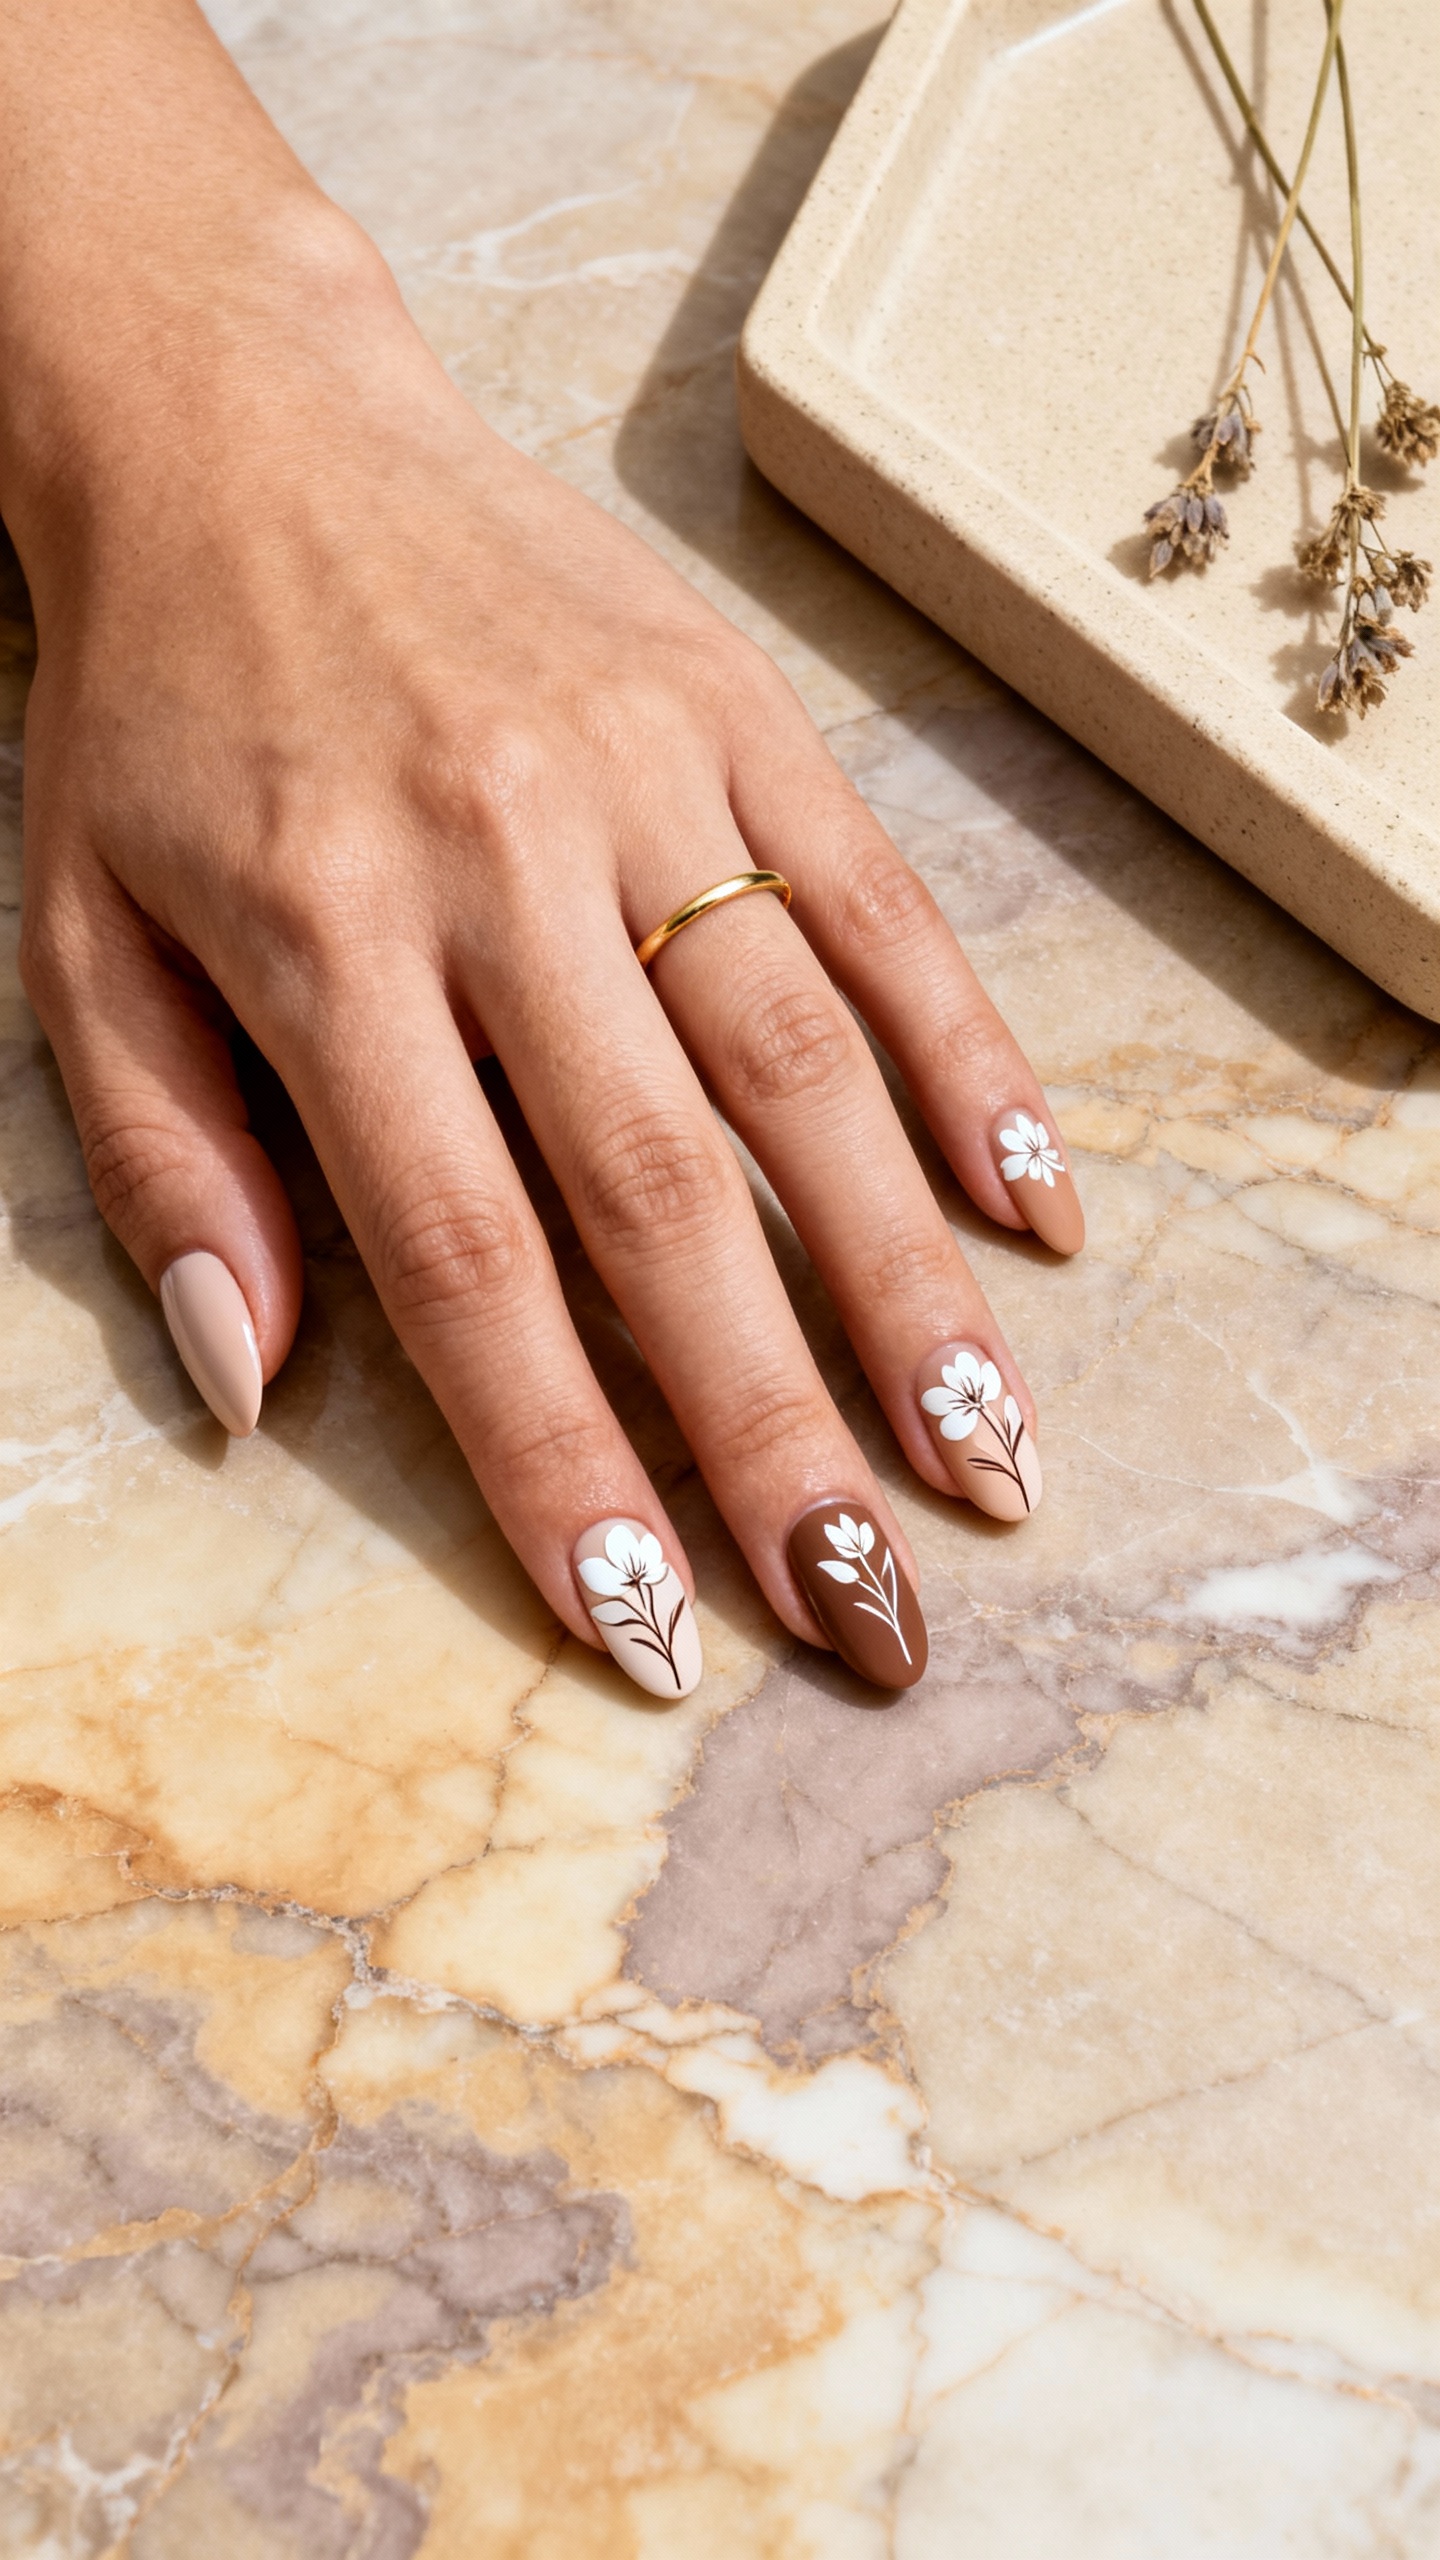
This one is modern, artsy, and still wedding-appropriate: a soft neutral marble base (think warm beige, creamy taupe) with delicate botanical line art florals in white or mocha. It gives “luxury stationery set” energy in flatlays, especially next to textured paper and wax seals. Shape-wise, go for short-to-medium squoval or almond for a clean, editorial silhouette. Wear tip: matte topcoat looks stunning in photos but can show oils—keep a cuticle oil handy and wipe nails before flatlay shots for a fresh finish.
5) Champagne Glitter Fade with Rosewater Florals (Negative Space Details)
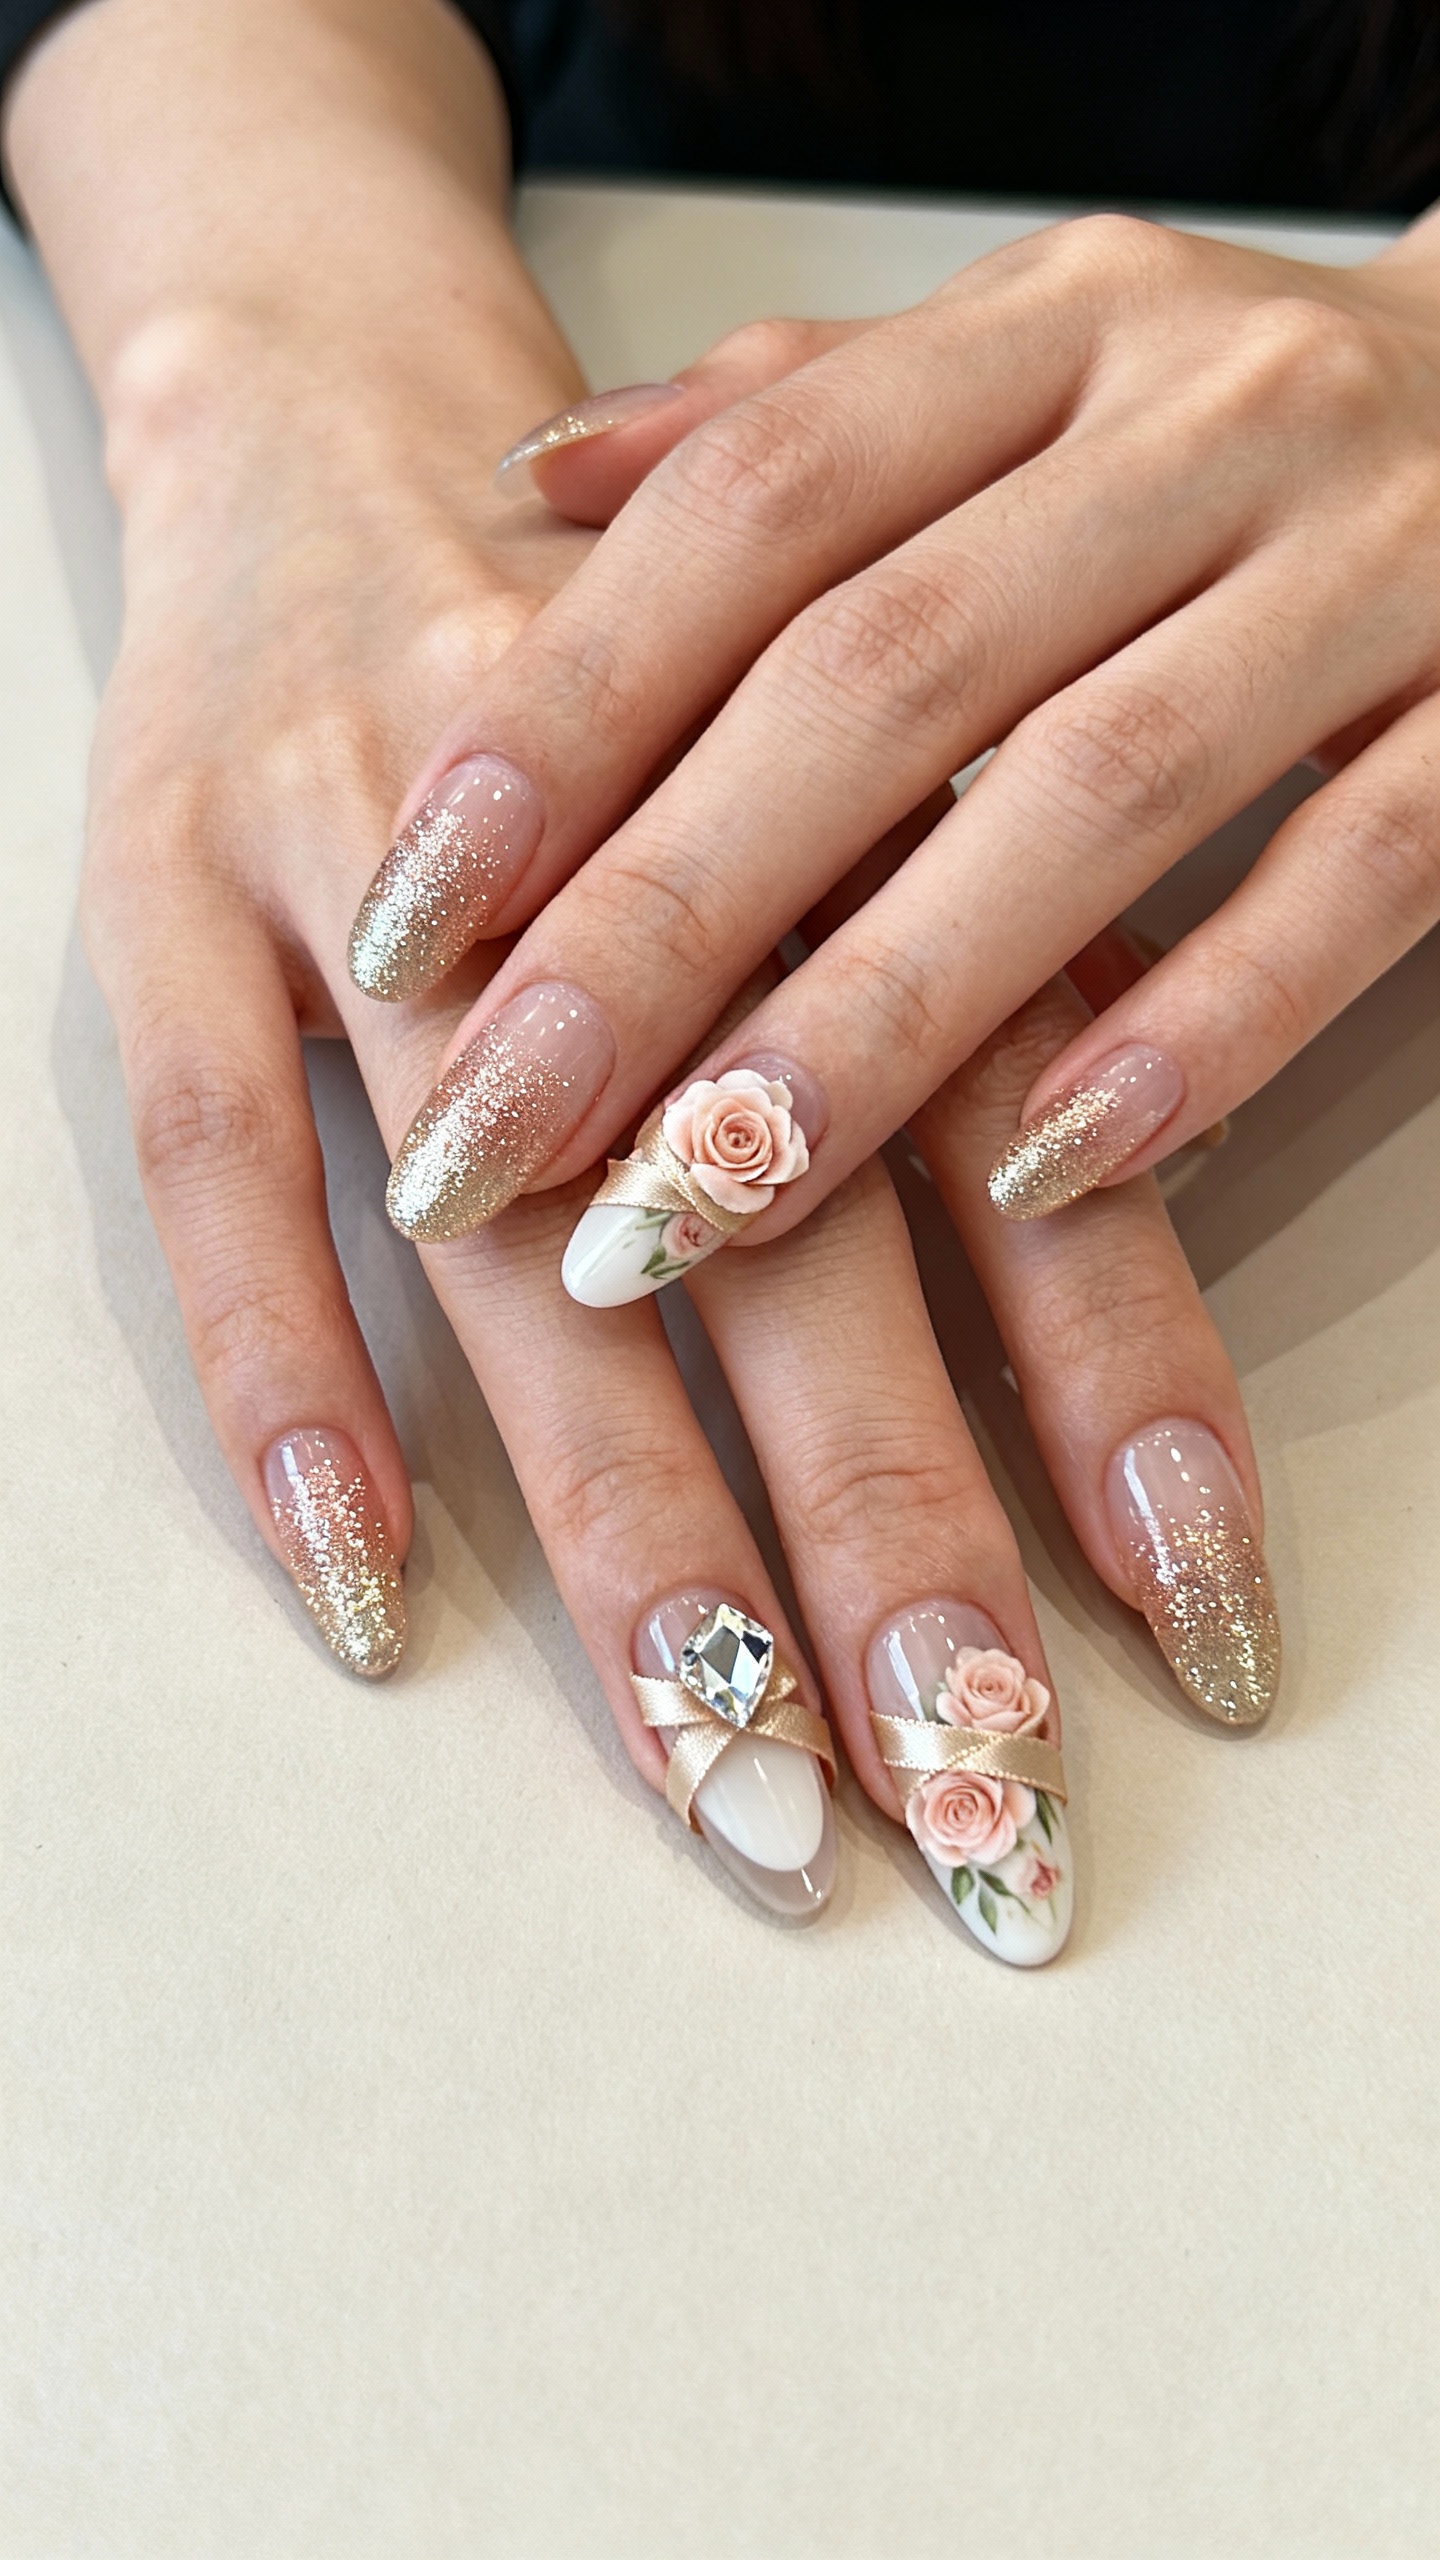
A champagne glitter fade is the ultimate flattering base for flatlays, and pairing it with airy rosewater florals using negative space keeps it looking luxe instead of busy. The vibe is romantic but grown, with a warm sparkle that complements gold jewelry and candlelit reception lighting. Try medium almond or oval so the glitter gradient looks seamless and the florals stay delicate. Wear tip: flash photography can amplify chunky glitter, so choose a fine micro-shimmer and ask your nail tech to seal edges for extra chip resistance.
FAQ
How far in advance should I get my wedding nails done?
For gel or builder gel, 1–2 days before the wedding is ideal so they look fresh in close-up photos and flatlays. If you’re doing acrylics or hard gel extensions, 2–3 days before works well in case you need a quick tweak. Avoid doing them a full week early unless you’re okay with visible grow-out in ring shots.
What nail shape looks best in flatlay photos?
Almond and soft oval photograph the most elegant because they elongate fingers and look balanced next to rings and bouquets. Squoval is also great if you want something classic and a little more practical. Extremely pointy stiletto or super-long shapes can overpower the flatlay unless your whole bridal vibe is bold-fashion.
Gel, acrylic, or builder gel—what lasts best for a wedding week?
Builder gel overlays are a sweet spot for many brides: durable, less bulky than acrylic, and very glossy for photos. Acrylic is the toughest option if you’re hard on your hands or want dramatic length. Standard gel polish is gorgeous but may chip sooner if your nails are naturally thin or you’ll be doing lots of packing, DIY, or travel.
How do I match floral nails to my bouquet without looking too literal?
Pull one or two tones from your bouquet (like ivory + soft blush, or white + greenery) and keep the rest neutral. Instead of copying exact flowers, use “floral cues” like petal shapes, line art stems, or tiny buds. This keeps the vibe cohesive in photos while still feeling elevated and intentional.
How do I make sure my floral nail art still looks luxury up close?
Ask for clean line work, a smooth topcoat, and intentional spacing—luxury florals look curated, not crowded. Keep your base sheer or milky and avoid too many competing finishes on every finger. And don’t skip cuticle oil leading up to the wedding; hydrated cuticles make the entire manicure look more polished in macro shots.